The Navigation Computer: Multi-drift Winds
Experienced pilots can often assess their drift with considerable accuracy just by estimation of the angle between their heading and the angle that a particular object on the ground makes as it appears to track underneath their aircraft at low altitude. Bush pilots and maritime patrol pilots, in particular, tend to develop this skill with experience. However, it is very difficult to assess ground speed quickly, except by timing the rate of DME distance change over a short period, and this only works when tracking directly towards or away from the DME, which may not always be the case. The alternative is using a stopwatch over a short precalculated distance, but this requires detailed preflight preparation and is not usually practicable.
However, it is possible to find a W/V by use of drift only, though it requires the pilot to fly on 2, or preferably, 3 headings which cut at a large angle to each other. This technique is known as the “multi-drift wind”.
The best multi-drift winds come from a 3-heading check, with the headings at 60° to each other. We will assume that a pilot is flying an initial heading of 030° at a TAS of 120 knots and decides that he needs an update of the W/V. He therefore assesses his drift on his present heading, then turns 60° left and makes another drift assessment, then turns 120° right for a third drift assessment. He then returns to his original heading. He notes the drift in each case and comes up with the following summary:-
Heading 030° Drift 10°P
Heading 330° Drift 5°P
Heading 090° Drift 5°P
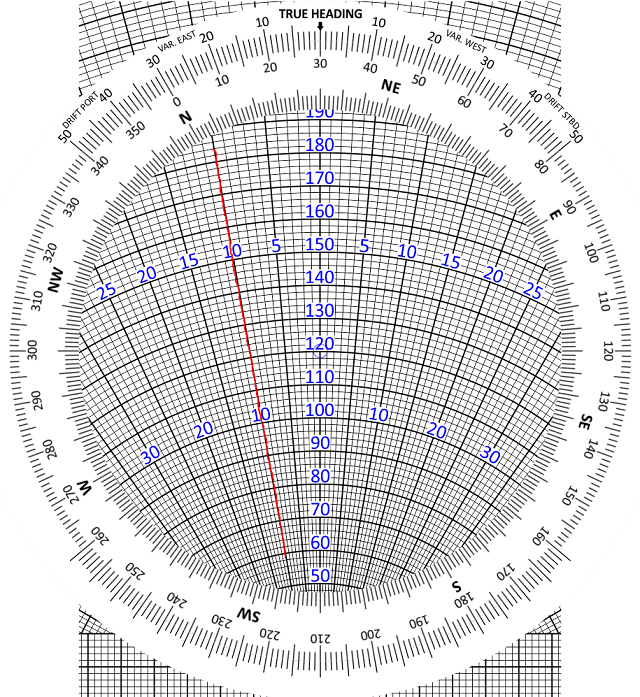
On the wind face of the Navigation Computer, rotate the heading to 030° and ensure that the TAS of 120 knots is under the centre dot. Then, using a straight-edge, draw a line along the whole length of the 10°P drift line.
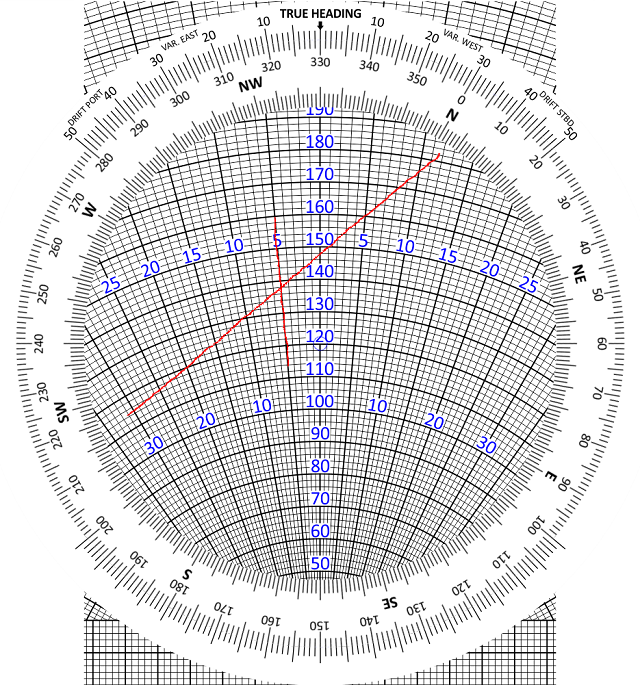
Now rotate the heading to the second reading of 330°. Ensuring that you still have 120 knots TAS under the centre dot, plot in the drift on this heading. In our example, it is 5°P. There is no need this time to draw the line along the whole wind face. You just need to have a small crosscut – say, 1 cm either side, as follows.
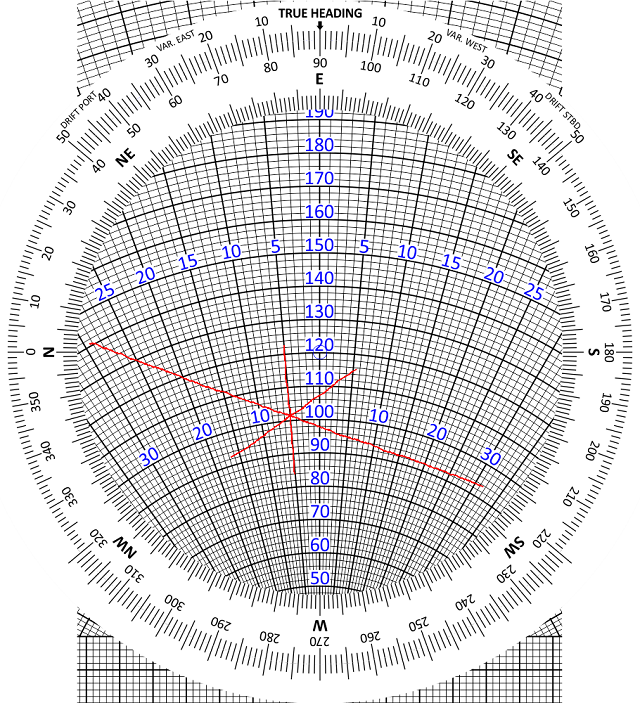
Now rotate the heading to the third reading of 090°. Ensuring that you still have 120 knots TAS under the centre dot, plot in the drift on this heading. In our example, it is 5°P again.
If the drifts have been assessed correctly, the third line should lie over or very near the other two, like this:-
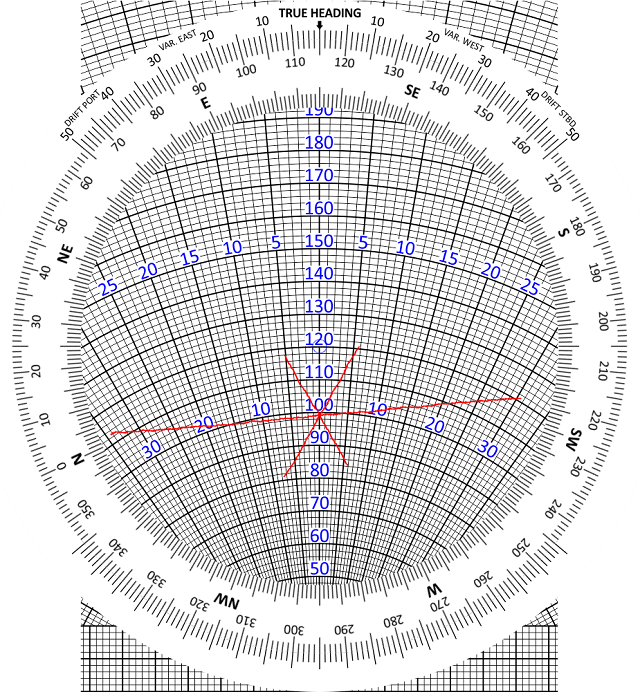
If the 3 lines do not coincide, a triangle will be formed by the intersection. This triangle is known as the “cocked hat”. The size of the triangle is an indication of the accuracy of the drift assessment. If they coincide, it is probable that all the drift assessments were correct. A small cocked hat means that the probable error is small. With a larger cocked hat, probably one or more of the drifts is in error to some extent.
However, assuming no cocked hat or only a small one (in which case you take the centre), you have established the W/V by taking the intersection of the drift lines. The 3 lines intersect at the wind point. Rotate it round to the 6 o’clock position to measure the wind speed and direction. In this example it is 115/21.
Next: Two-drift Winds
© 2022 terms of use privacy policy
